DFT Case Creator
Projects ∙ Links:
A tool for creating the folder structure required for examining mobile devices at Sussex Police
- Background
- A look around the application
- Usage
- Errors
- Keeping track of OICs
- Logging, and creating a case
- Code snippet
Background
We are required to keep contemporaneous notes during our examinations, for which we use a word document template. Due to the amount of data we need to log and how many devices we process yearly, we need to reduce human error as much as possible and keep things as consistent as possible. Due to the nature of work that we undertake, it may not be possible for individual cases to be reviewed quickly after we produce our reports and can take time for each case to be processed; due to this, consistent and thorough note taking is extremely important to ease the reviewing of cases at a later date.
In order to keep things consistent, all of our examinations follow the same format as the same information needs to be logged, so we use a tool to set each case up for us. By keeping things consistent, it makes it easier for anybody in our office to look at any previous examination and know what processes have taken place.
This tool allows us to quickly recreate our folder structure for each device we examine, while giving everything a name unique to the current case with very minimal chance of human error. It also automatically logs information and the actions it takes, and fills out part of our template for consistency and continuity.
This tool is inspired by a previous similar tool that a former colleague had created, while incorporating new features and allowing for certain aspects to be updated without requiring a new version of the tool to be recompiled and distributed.
A look around the application
Usage
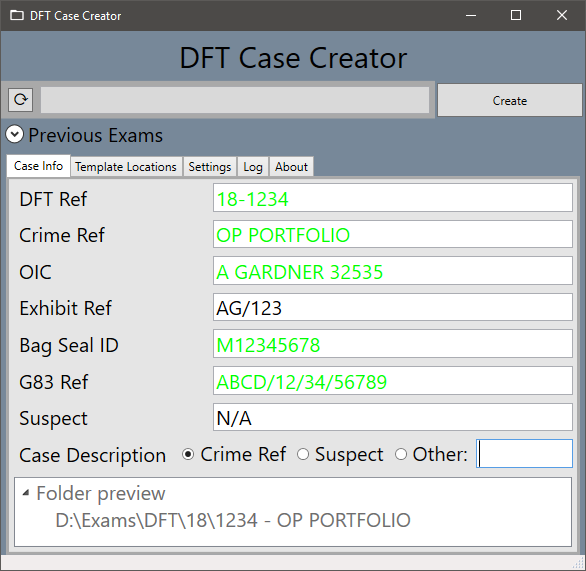
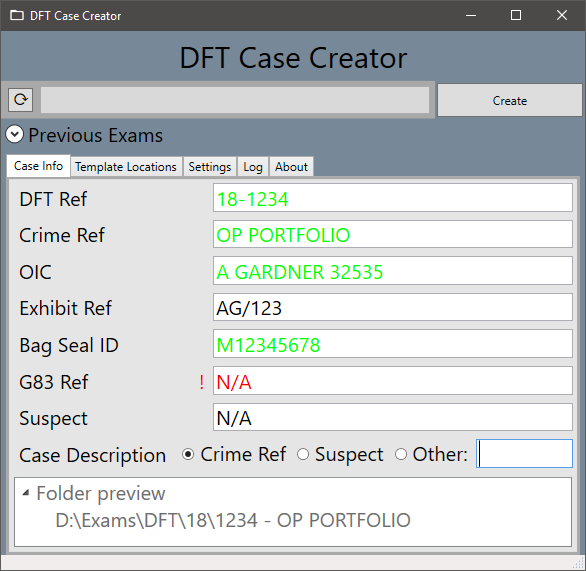
You start off by entering your case details into the boxes on the Case Info tab, and when you press the Create button it will automatically:
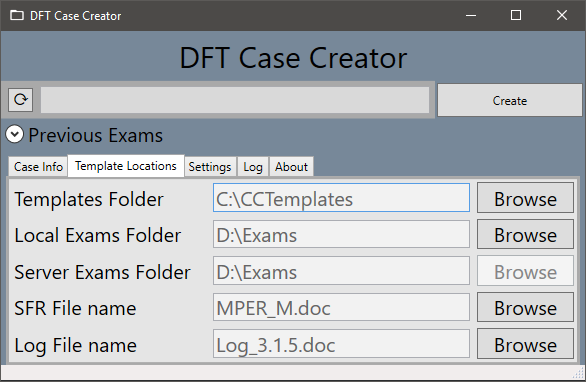
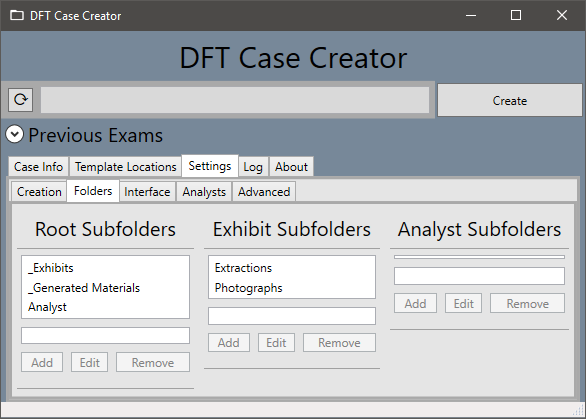
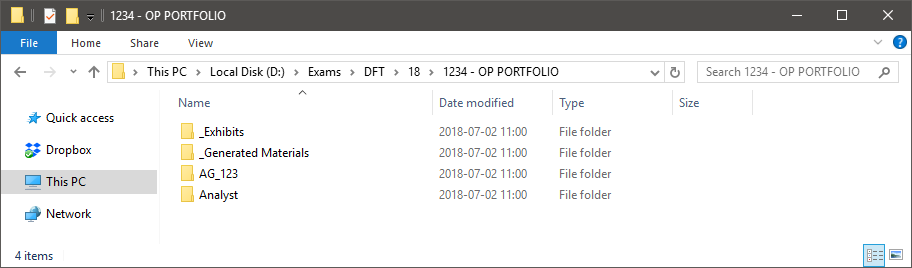
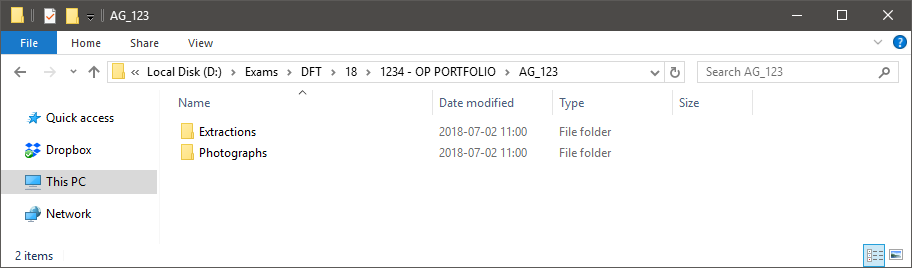
- Create a new folder for your case in your exams folder, which is specified in the Template Settings tab, and create a subfolder for this exhibit including all subfolders specified in the Settings - Options tab.
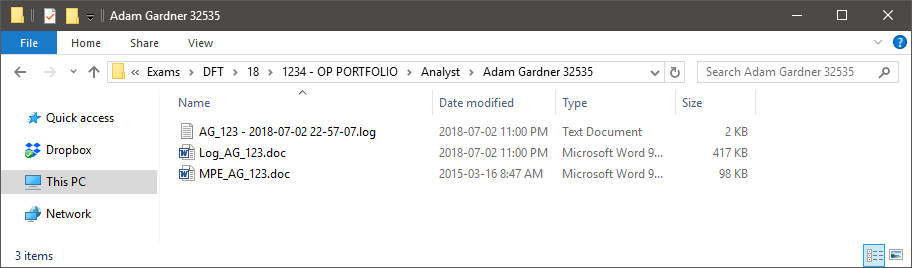
- Copy over the current templates word documents, which are specified in the Template Settings tab and saved in an XML settings file, and rename them.
- Open up the contemporaneous notes document and starts filling in the data for you, from the information you enter in the Case Info tab.
- Create a log file in the root of the newly created folder detailing the actions that the tool has taken.
Errors
While you’re filling out the Case Info tab, it checks your entries against know formats using RegEx searches and alerts you to any irregularities that it comes across. It flags these up by alerting the text colour and brings up an “!” flag to the left of the textboxes and gives you more information in a tooltip when you hover over. If you attempt to press Create, depending on the severity of the errors it will either give you a more in-depth error or will continue as planned. This behaviour allows us to cater for potential special submissions, such as those brought to us by somebody from a different force, where their details fall outside of our expected RegEx search results.
Keeping track of OICs

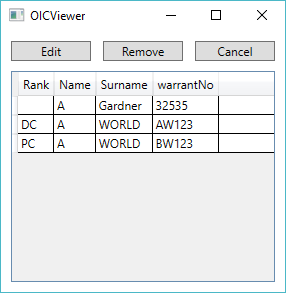
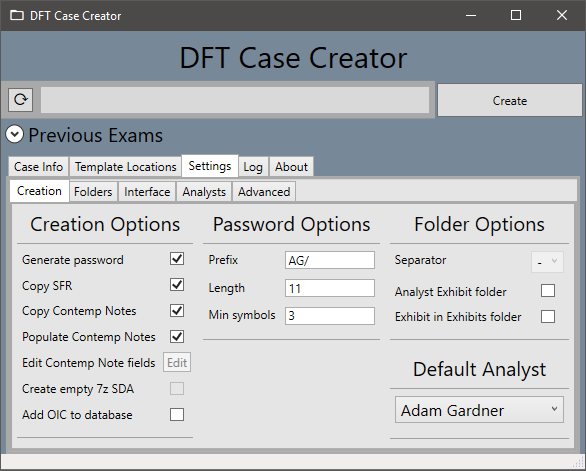
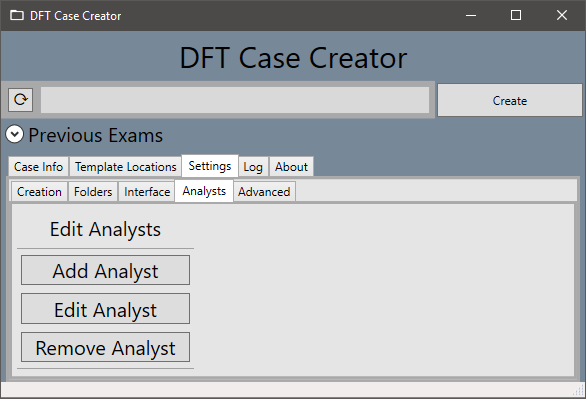
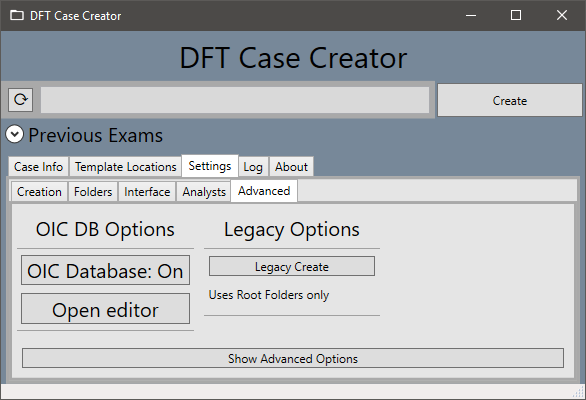
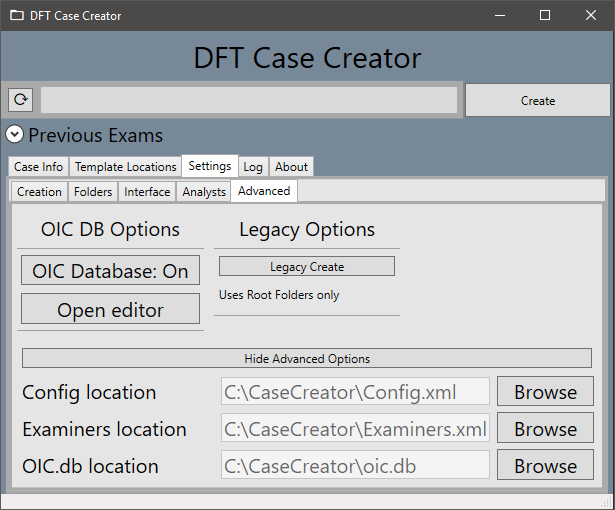
In order to save time as we process more submissions, and to help reduce human error, information about the applicant is added into a SQLite database so that we can recall their correct information later if they submit another submission to us. This behaviour can be toggled off in the Settings - Advanced tab, and the location of this file can be updated in the hidden Advanced options section on the same page, so that multiple people can use the same database. Users can browse this database by clicking on the OIC label, which will change to red and offer a tooltip upon hovering over. Selecting an entry in the OICViewer window and double clicking or pressing Select will copy the selected information into the OIC textbox in the Case Info tab. A version with the ability to edit can be opened via the Options tab, which allows entries to be updated or removed.
In order to attempt to future proof this tool as much as possible, and to cater to workflow changes and special submissions, the majority of the options in this tool are saved in .XML files that can be edited either manually or through the two options tabs. This includes changing the default user, editing users to the dropdown list, updating template files & folder locations, or editing what folders are required to be automatically created.
Logging, and creating a case
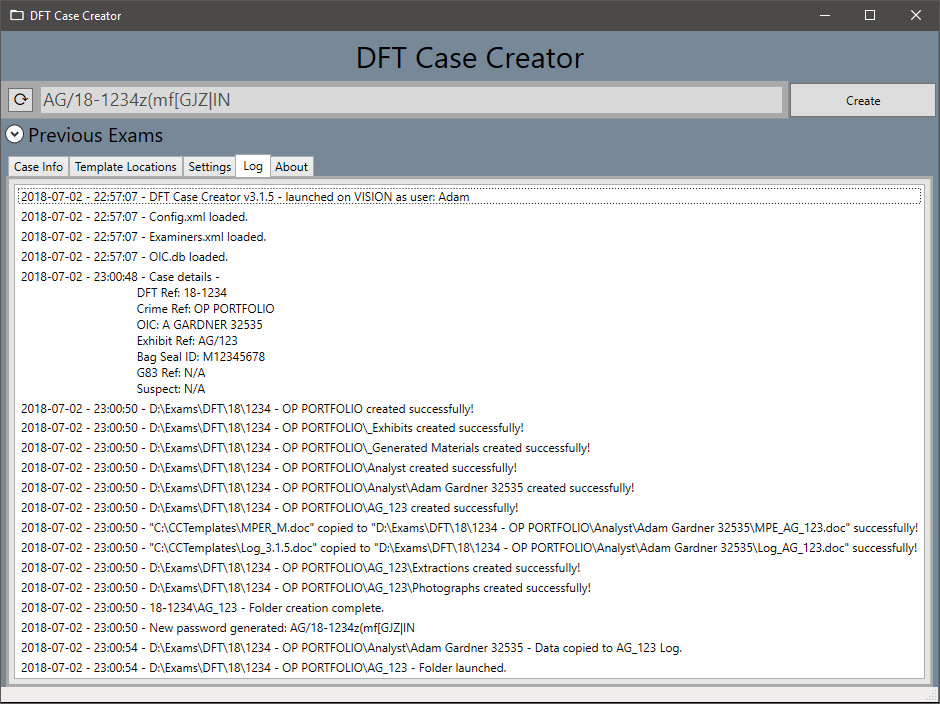
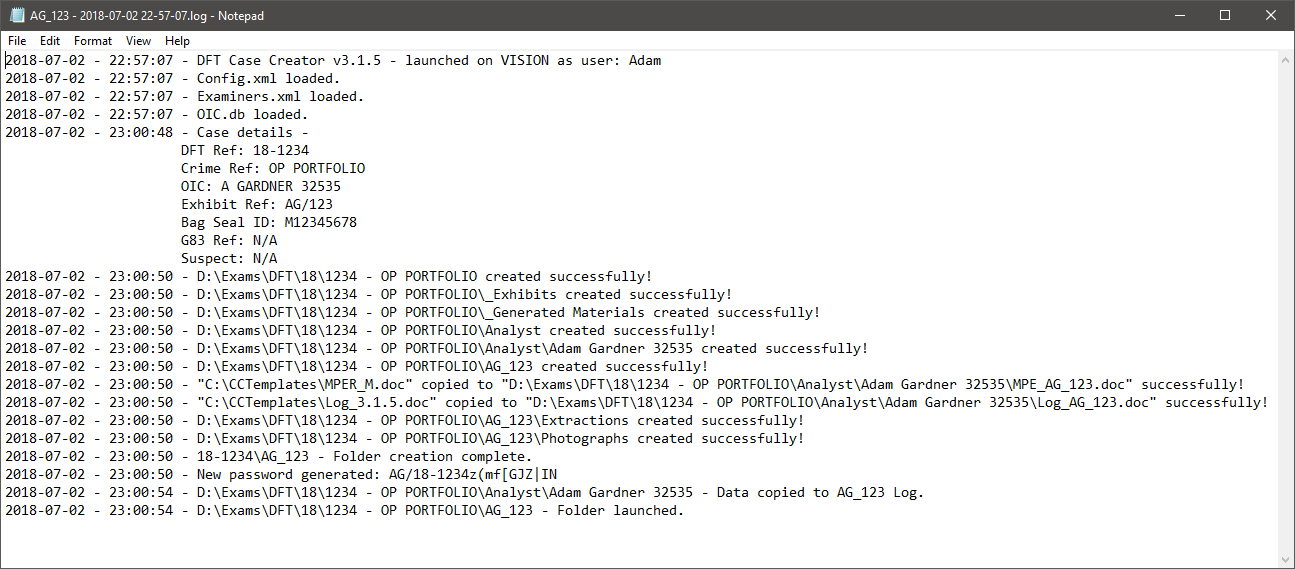
Whenever settings are updated, or you attempt to create a new case, information will be saved to a log in order to show what actions it has taken for continuity purposes.
My future goals for this application are as follows:
- Add a history of the cases that have been created, for tracking and statistic purposes.
- Add the ability to track which cases are currently open, and add the ability to quickly add another exhibit to a case that already exists.
- Expanding the above point, adding the ability to close cases, which will run our usual processes or zipping up the folder, and backing it up to our server automatically, along with creating a log of the actions taken.
- Upon closing a case, parse information from the completed exhibits and add them to a spreadsheet / database to track what devices we see most often, track storage capacity of devices and see start/ finish times to see how storage capacity is affecting submission completion times.
Code snippet
/// <summary>
/// Updates XML files
/// </summary>
/// <param name="XMLName">The name of the XML file to be updated</param>
/// <param name="Root">The root node of the XML file</param>
/// <param name="Attributes">A list of Attributes to be updated</param>
/// <param name="AttributeValues">Values for the previous Attirbutes</param>
private void UpdateXMLDynamic(string XMLName, string Root, string[] Attributes, string[] AttributeValues)
{
    XmlDocument Doc = new XmlDocument();
    Doc.Load(XMLName);
    XmlNode NodeData = Doc.SelectSingleNode(Root);
    string UpdateString = "";
    foreach (XmlNode EachNode in NodeData)
    {
        for (int i = 0; i < Attributes.Length; i++)
        {
            if (EachNode.Name == Attributes[i])
            {
                EachNode.Attributes["Name"].Value = AttributeValues[i];
                // Adds in an & before the final item to the UpdateString, to be passed as the UpdateLog message
                if (i == Attributes.Length -1 && Attributes.Length != 1)
                {
                    UpdateString += " & ";
                }
                UpdateString += Attributes[i];
                if (Attributes.Length != i+1 && i != Attributes.Length -2)
                {
                    UpdateString += ", ";
                }
            }
        }
    }
    Doc.Save(XMLName);
    int OldIndex = int.Parse(Config["DefaultExaminer"]);
    int CurrentIndex = ExaminerCombobox.SelectedIndex;
    LoadXML(XMLName);
    XmlElement OldItem = (XmlElement)(ExaminerCombobox.Items[OldIndex]);
    XmlElement CurrentItem = (XmlElement)(ExaminerCombobox.Items[CurrentIndex]);

    if (Attributes[0] == "DefaultExaminer")
    {
        UpdateLog(string.Format("{0} changed from {1} to {2}!", UpdateString, OldItem.Attributes["Name"].Value, CurrentItem.Attributes["Name"].Value));

    }
    else
    {
        UpdateLog(string.Format("{0} settings updated!", UpdateString));
    }

}